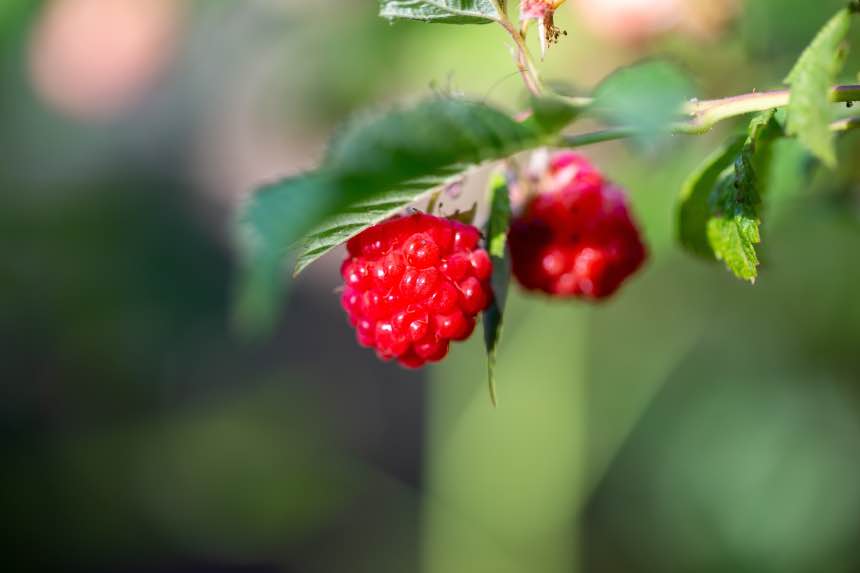
Raspberries are a delicious treat with a unique flavor. You can add these little red beauties to desserts, cocktails, juices, and jams or nibble them right off the plant. Unfortunately, raspberries can be rather pricey when purchased in-store. Having a few plants at your disposal saves you money while ensuring a consistent supply. Of course, to gain those tasty fruits, transplanting raspberries is essential to give them the home they need to thrive.
How to Start A Raspberry Plant
You can’t transplant a raspberry plant without first growing a starter, which requires planting seeds or cutting canes off existing plants. Let’s take a look at both methods.
Planting Seeds
Planting raspberry seeds takes more time to grow an established plant for transplanting. The upside is that you can acquire several seeds from a single raspberry. To extract them, separate those little round pieces, called drupelets, which make up the fruit. The seed is beneath the fleshy part and can be released when the drupelet is squeezed. You can also carefully crush the raspberry with the back of a spoon to remove the seeds.
Purchasing seeds is another option, which allows you to choose one of many raspberry varieties. These vary in shape, size, color, flavor, and harvest time, so you can choose the perfect fruit to match your climate and taste.
Extracted seeds require a germination period before planting. Using a seed tray, plant the seeds an inch apart and ¼-inch deep in potting soil. Place the tray in a cold frame or an unheated room for the winter, spraying the soil regularly to keep it damp.
When the outdoor temperature reaches about 60 degrees Fahrenheit, move the tray to an area that receives dappled sunlight. After a few weeks, the seeds will have germinated and will begin to grow. When they reach about one inch in height, transfer each seedling to an individual pot. Purchased seeds don’t need the germination period, so can be planted in the spring as usual.
Using Suckers
Suckers, also called canes, starters, or runners, are quicker to transplant since these sprouts are ready to move. You can purchase canes from a nursery or cut one from an existing plant. Doing so allows you to obtain raspberries from any raspberry patch.
Raspberry plants spread by sending roots horizontally through the ground, which produces new plants around the current one. Digging up these new plants allows you to move them to new areas. Be sure to choose healthy suckers with no damage or broken canes. When they reach a minimum of 5 inches tall, they will have established roots and are ready to move.
To remove the sucker, use a spade to cut into the soil between it and the host plant, at least 4 inches from the new growth. Sever the connecting root, then dig an area around the plant to maintain as many of its new roots as possible. Move the young plant in a circular motion until it comes free of the soil.
When using canes, it’s best to prepare the transplant area before cutting them free of the host plant. Doing so will ensure it has a new home as soon as it is removed from the ground.
Transplanting Raspberries In A Garden
Transplanting raspberries in a garden requires several steps to ensure the new plants thrive. Spring is ideal for transplanting as long as the frost risk has passed.
Step 1 – Harden The Plant
If the plant is started indoors, and you’re moving it outdoors, it may need hardening before transplanting. To begin, place the seedlings outside for an hour on the first day. Add another 30 to 60 minutes to its outdoor time every day over the next week until it can handle being outside all day without wilting.
Step 2 – Prepare The Transplant Area
When you’re ready to transplant your raspberries, the first step is to find the perfect spot for them. Raspberries need about 6 hours of sunlight each day, so avoid those overly shady spots. The soil should also be lightweight and well-draining. Areas with an abundance of clay or sand should be avoided. You can also add a few inches of compost to increase the moisture and nutrient content of the soil. Remove any nearby weeds to prevent them from sucking up those much-needed elements.
Step 3 – Plant The Raspberries
When the soil is ready for planting, dig a hole about 15 inches deep for the new plant. If transplanting multiple suckers, leave two to three feet between each one. Place a new plant into the hole, add water, and cover the roots with soil, packing it down to prevent air pockets. Adding a layer of mulch on top retains moisture.
Transplanting Raspberries In A Container
Using a container for your new raspberry plants allows you to move them as needed throughout the year with minimal soil maintenance.
Step 1 – Harden the plant
Raspberry plants started indoors require hardening using the method described above. Canes cut from outdoor sources won’t require this step. This is also not required if you’re growing the raspberry permanently indoors.
Step 2 – Choose the Container
You don’t need a special container for growing raspberries as long as it is the right size. Transplants require one of about 24 inches in diameter to give the roots room to spread out. Be sure there are drainage holes on the bottom to release excess moisture.
Step 3 – Add Soil
Pour well-draining potting soil into the container until it is about half full. You can also add some compost for extra nutrients.
Step 4 – Plant the Raspberries
Place the new raspberry plant into the container, resting it on the soil layer. Then add more soil around the plant, completely covering the roots. Those roots are shallow, so press the soil down and add a bit more if needed to keep the raspberry cane upright. Add water until the soil is damp. Move the container to an area with at least 6 hours of light each day.
Treating Raspberry Shock
All plants can go into shock when transplanted from one source to another. Shock is distinguished by wilted leaves and drooping stems. It isn’t a death sentence to raspberry transplants as long as you take special care of the plants to help them recover. To combat shock, keep the soil damp, though not soggy. Container plants can be moved to shady areas while the plant recuperates.
Transplanting Raspberries
Transplanting can seem daunting at first but is easy once you’ve done it a few times. Raspberries are quite easy to transplant and generally take well to it. With the above tips in mind, you’re well equipped to do so in your garden.