Spring and summer are busy gardening times involving planting, weeding, watering, and harvesting those tasty herbs and veggies. By autumn, beginners may assume most of the work is done, but this isn’t the case. Preparing raised beds for winter is an essential part of the process. Doing so ensures those spaces are protected from the harsh winter cold, maintain their nutrients, and are ready for new growth in the spring.
In this article, we’ll look at the simple yet important steps to prepare your raised beds for winter. By doing so, you’ll set yourself up for success in the spring and reduce the work you’ll need to do.
How To Prepare Raised Beds For Winter
Getting your raised beds ready for the coldest months of the year isn’t difficult, though it involves several steps. The following sections cover essential care tips to ensure your garden is prepared for winter so you can start planting as soon as the weather warms.
Take Notes And Photos
It’s not easy to remember where you planted your crops year after year. Taking notes in a gardening journal or snapping a few pics on your phone helps you keep track. Doing so ensures you’re rotating veggies and other plants. You can also track what did well and what failed, and anything you didn’t like and may not want to plant again. You can even keep track of pests and diseases to make it easier to identify them if they come back.
Remove Old Growth
Some gardeners assume leaving decaying vegetable plants adds nutrients to the soil. Unfortunately, doing so does more harm than good. When those dying annual plants rot, the risk of pests and disease increases. These stay in the soil over winter and put spring plants in danger. Removing old growth reduces the chances of such issues and makes the beds more aesthetically appealing.
While removing old veggies and other annual plants, don’t forget the weeds. Pulling as many as possible prevents those roots from spreading or new seeds from dropping. You’ll have fewer weeds to deal with in the spring, saving time and effort for easier planting. In my experience, it’s always easier to deal with weeds before they really take hold. Get them early and get them often.
Protect Perennials
When removing annual plants and weeds, avoid pulling the perennials from your raised beds. Instead, protect them using covers during the colder months for continuous harvests all winter. For those in the northern climates with icy winters, those perennials will die off and regrow in the spring. Harvest what you can in the fall, then leave them until you see those new sprouts the following year.
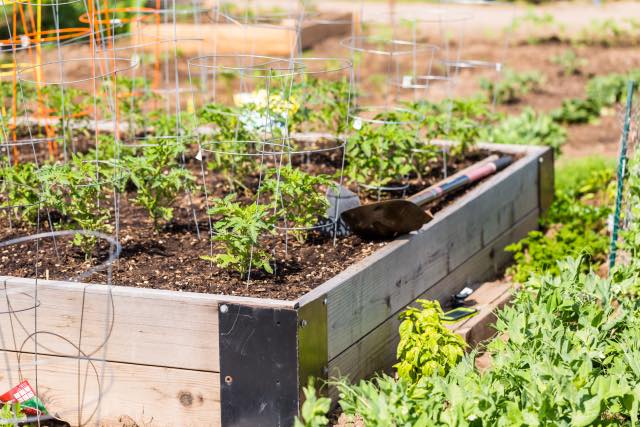
Remove Stakes And Supports
Once all the old growth is removed, those plant supports can come out of the garden, including trellises, stakes, and cages. Check them for damage and repair them if possible. Then store them somewhere they’ll be protected from fall moisture and winter cold. You can also remove plant tags from raised beds, saving them for next year, or toss them and make new ones in the spring. This helps extend the life of your garden supplies and ultimately saves you money.
Add Organic Material
Plants growing in the spring and summer suck up plenty of nutrients. Once they’re done growing, and the dead plants and weeds are pulled, it’s time to regenerate the soil. The best method is to add organic matter. Compost is a fantastic option since it is full of nutrients and easy to make at home.
You can also try aged manure, which contains primary and micronutrients required for healthy plant growth. Fresh manure is also high in soluble nitrogen but it also contains ammonium, which can burn plants. It’s best applied to empty beds rather than those containing plants you intend to overwinter.
When adding organic matter in the fall, it’s best to spread it evenly over the top of the soil. Over the winter, the nutrients will slowly leach into the dirt, preparing it for spring planting. If you notice soil shrinkage and need to fill in the gaps, you can also add extra soil or loam to fill in the gaps before adding organic material.
Create A Cover
Creating a cover for your raised beds can be accomplished using two methods. One option is to plant a cover crop, such as oats or rye. These have roots that work their way into the soil, aerating it while breaking up hard areas. The foliage above the soil protects it from erosion and weeds. In the spring, cut it back and plant new crops.
Adding mulch is another way to protect the soil in raised beds. Gather leaves that have fallen in your yard and shred them. Then spread them over the soil in your gardens. As well as preventing erosion and weeds, these leaves break down, adding extra nutrients for healthier soil in the spring.
Check For Slugs and Other Pests
After a mild, wet summer, a slug infestation in the fall is likely. Those using covered raised beds in the fall should watch for such pests. These nasty critters will nibble your crops, destroying what you’ve worked so hard to grow. A few organic methods, like wool, copper, beer, or slug bait, are available to deter or kill slug populations. Encouraging predators, like birds, snakes, or frogs, also get rid of the slugs residing in your gardens.
You should also be mindful of other common garden pests. Keep an eye out for signs of their presence, and look to deal with them as swiftly as possible.
Repair Any Damage
Changing temperatures and weather conditions may cause shifting or damage to the materials used to create raised beds. As you ready the soil for spring, check the sides and other areas for issues. If you notice any loose, cracked, or broken pieces, fix them immediately or take note of them to do the necessary repairs in the spring.
Prepare Season Extenders
Season extenders allow you to prolong the outdoor growing season of many plants. Though you can still use them in the fall for a late harvest, when you’re done with these handy covers, get them ready for spring. Clean them if needed, then fold or dismantle them, keeping the pieces together. Place them in a gardening shed, garage, or basement with other plant tools and accessories. Then, in the spring, they’ll be easy to grab for early planting.
Preparing Raised Beds For Winter
Raised gardens have several benefits, including better moisture retention and drainage, fewer weeds, and organized spaces. Taking the time to prepare these little gardens for winter ensures they’re ready for planting when the weather warms in the spring. Remember, the time you spend now preparing them is time saved come spring when the real gardening fun begins!