One of the most common herbs used in cooking is basil due to the mix of sweet and spicy flavor and heavenly aroma. Though dried basil is readily available at any grocery store, growing your own ensures a fresh supply is always on hand. Between you and me, home-grown basil always tastes better than store-bought anyways. That’s not scientific, but I stand by that claim vehemently.
Of course, an essential part of home gardening is moving the seedlings from their original pot to a new, larger home. If you’re unsure how to transplant basil safely, check out our handy guide.
Step 1 – Plant The Seeds
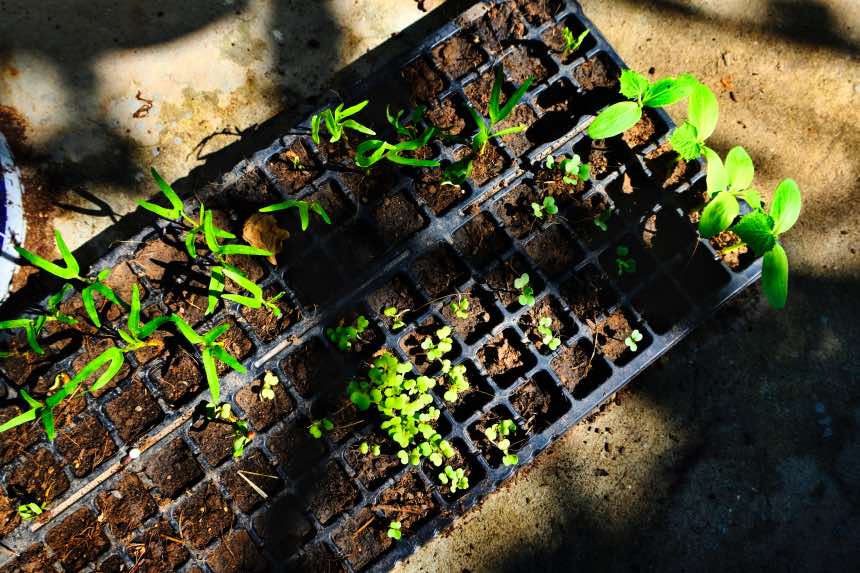
The first step to growing basil is planting the seeds. Tiny containers, called starter pots or seed starter trays, are best for this, giving the seeds just enough soil and moisture to germinate. You can use plastic pots from a garden supply store or home center.
Making your own biodegradable seedling pots is an eco-friendly option. These will break down naturally with no waste, so they can be planted directly into the soil with the seedlings when they are ready to be transplanted. This makes it a little easier come transplant time, but takes more time at the initial planting.
Fill your chosen container with about a half-inch of nutrient-rich potting soil and drop a few seeds on top. Add another quarter-inch of soil over the seeds, sprinkle on a bit of water, and place the pots in a warm area with bright direct sunlight. It may take about two weeks to see sprouts, so keep an eye on the soil and mist it when they begin to dry out.
Step 2 – Harden The Seedlings
The direct sunlight coming through your windows isn’t as harsh as the light outside. If you plan to place your basil plants outside, hardening them will prepare them for the strong summer light. Of course, if you’re keeping your basil indoors for the duration of its growing season, you can skip this step.
To harden your seedlings, wait until they have at least two leaves growing on the stem and roots reaching the bottom of the pot. Doing so will ensure they are strong enough to transplant. Then place the pots outside on a sunny day for about an hour before bringing them back inside. They will likely have begun to wilt during their time outside, though they’ll perk up again when they are back in your home.
Over the next two weeks, place your seedlings outside for progressively longer durations. Doing so increases their tolerance for the midday sun. By the end of the two weeks, they should have adapted quite well and can be transplanted outdoors. The sun will dry out the soil quicker than your home conditions, so be sure to increase your seedlings’ watering schedule.
Step 3 – Choose The Transplant Area
Once the frost risk has passed, you can move your basil plants outside. Basil seedlings can be planted into a bed or a container, depending on the space you have available. The soil should be well-draining and fertile, though you can add a few inches of compost to increase the nutrient content if needed. Basil plants don’t like to be too crowded, so plan for about 10 inches of space between each one.
If using a pot for your basil plants, be sure it is large enough to house them all or have a few small pots ready for your seedlings. Each pot should have drainage holes to release excess moisture. Basil plants can grow to heights of two feet, so the container should be sturdy enough to support fully grown plants. You can arrange your pots however you like, though don’t add soil until you’re ready to plant the seedlings.
Step 4 – Separate The Seedlings
Not all seedlings are strong enough to survive transplanting, so it’s best to separate them from the stronger plants. Remove the smallest seedlings from the soil by plucking them or pinching them off. The remaining seedlings also need to be separated from each other, though the process is somewhat more delicate to prevent damaging their roots.
The best method is to hold a seedling loosely by the stems and leaves and remove it from the container. Pull it gently to separate it from other seedlings without damaging the roots. If needed, use a toothpick to untangle any mixed-up roots. Try not to lose too much of the original soil in the process since it offers some protection for the seedling’s small root system. Place each separated seedling back into a seedling pot for support.
You’ll want to make sure that each plant has 8” of space or more to grow. This ensures there are no issues with overcrowding, which can lead to slow or stunted growth as the plants compete for nutrients.
Step 5 – Harden The Transplant
Once the seedlings are separated, basil plants need a second hardening. This step is essential for outdoor plants, though your indoor plants benefit from it as well. To harden the seedlings, repeat the method described above, placing them outside for a short time the first day and increasing their outdoor time each day. Once the basil transplants are hardened, they are ready for their new homes.
Transplanting Basil - Tips For Success
The best time to transplant outdoor seedlings is in the morning to give them a full day of sunlight. For seedlings planted in the garden, dig holes about 4 inches deep to fit the entire root system of each plant. Be sure to leave about 8 inches between each seedling to give their roots, stems, and leaves enough room to spread out. Add a sprinkle of water and then place each plant into the soil. Cover the roots, though not the stem, and sprinkle more water over the top.
For indoor or outdoor plants in containers, add a layer of potting soil to the bottom of the pot. It should be about an inch thick. Carefully remove the seedling from the starter pot and place it on top of the soil in the new container. Add more potting soil until it reaches the top of the basil’s root ball. Add water to the soil and place the container where it will get at least six hours of sun each day.
Monitor The Transplants
Your transplanted basil seedlings may seem to thrive right after planting, though they may not stay that way. Some plants may suffer from transplant shock, which can occur when a plant is moved from one home to another. Caution when transplanting any plant is best, so try not to touch or damage the roots and keep as much of the original dirt around them as possible. This helps reduce the stress your plant’s transplant experience, which ultimately reduces the chances of adverse results.
Transplant shock can cause dropped or yellow leaves and wilting, preventing the plant from thriving. If you notice such issues with your basil plants, keep the roots damp without over-watering, and fertilize every few weeks. With love and attention, the plant will likely recover, sprouting fresh basil leaves before you know it.
How To Transplant Basil
Transplanting is a key step in most plant’s growth and is important to provide them the room they need to grow. While not difficult, it can be daunting for first-time gardeners. With the above steps and tips, you’re well prepared to transplant your basil, and enjoy this delectable herb and its pleasant aroma in your garden.