Storing bulbs over the winter is something that gardeners should start practicing if they want to reduce their planting expenses in the spring. Buying new bulbs every spring may not cost that much initially, but it does accumulate over time.
Not all bulbs need to be overwintered, but several “tender” bulbs do. These ones cannot take the cold temperatures winter brings, and need a little extra help from us to survive.
However, not everyone knows how to properly store bulbs during the winter. If you’re one of them, don’t worry; we’ll show you how. The process is super simple and only takes a few minutes each year.
Which Bulbs Should You Dig Up?
In general, you want to dig up and overwinter summer bulbs. Spring bulbs are typically more hardy, and often need a period of cold in order to bloom properly in the spring. You won’t need to dig these types of bulbs up, they will survive the winter.
Here are a few examples of common “tender” bulbs that should be overwintered in cooler climates:
- Cannas
- elephant ears
- Gladiolus
- tuberous begonias
- Dahlias
- Amaryllis
Before digging up your bulbs, do a little research to determine their needs and whether you need to actually dig them up.
9 Simple Steps to Store and Overwinter Bulbs
Protect your tender bulbs from frost damage if you want to enjoy them again in the next growing season. Just follow the steps below, and your bulbs will be safe and ready to go once spring rolls around.
1. Begin Before The First Frost
The best time to dig up your bulbs is before the first frost date in your area. You want to avoid waiting too long and exposing your bulbs to the cold. This date can change based on your climate and hardiness zone.
2. Trim Off the Plants
Before digging up the bulbs, it’s a good idea to trim back the dead parts of your plant. Use a clean knife, and feel free to compost the cuttings as you go. This makes it easier to dig up the roots and helps keep your garden tidy.
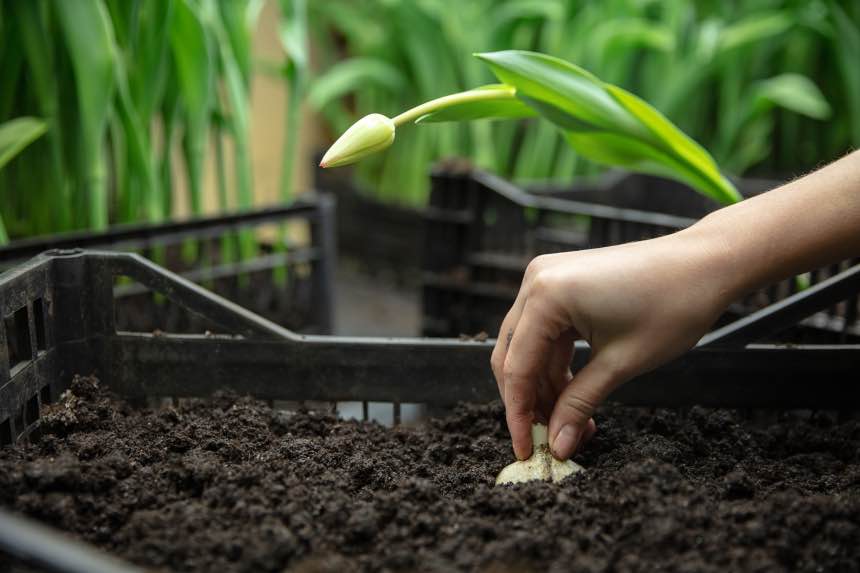
3. Dig Up the Bulbs
Gently begin to dig out your bulbs. You want to avoid damaging the bulbs as this can make them more susceptible to disease and rotting. Start outside where you believe the bulbs to be and slowly move inward. This helps reduce the risk of accidentally nicking a bulb with your shovel.
4. Shake Off the Soil
Carefully brush off any excess soil from the bulbs that were dug up. If the rains during the fall season have soaked the soil, then you may need to be a bit forceful and knock the soil clumps off the bulbs. If the weather is still warm, you can hose off the bulbs in order to remove the soil faster. However, make sure that you do not take off any protective outer layers of the bulb.
5. Trim Off the Stems and Roots
Use clean, sterilized, and sharpened pruners to shorten the stems and roots. Leave about two inches to three inches of stem at the most. When doing this, make sure that you avoid nicking and wounding the bulbs as noted above.
6. Dry Out the Bulbs
Since the bulbs are just coming off their fall season, chances are they are still a bit plump and full of moisture. It’s important to let them air-dry before being packed away for the wintry months. In order to dry them out faster, lay the bulbs out on paper towels or sheets of newspaper in a warm, dry place. Allow them to dry out for around two weeks or until completely dry. Storing wet bulbs can lead to mold or rot problems.
7. Store the Bulbs
Wrap up the bulbs in a mesh bag, paper bag, or even in newspapers. Add a little growing medium like peat moss, vermiculite, or coconut coir. You can add some more layers of paper in between to help absorb excess moisture, which lowers the chances of mold and rotting. However, you should also ensure that they get the right amount of air circulation.
You can store the bulbs in everything from cardboard boxes to garden planters. Just ensure that they are kept dry and have proper air circulation to dissuade mold.
8. Check the Bulbs
Regularly look for any rotten bulbs and dispose of them. You want to catch any issues early so as to limit the number of damaged bulbs. Issues like mold and rotting will typically spread if not caught early and can ruin an entire crop of bulbs. Stored bulbs won’t last for more than a year, so you should start planting them once the weather becomes more favorable.
9. Plant the Bulbs
Your bulbs that have been stored over the winter will have different planting times according to their type and where you live. Generally, you’ll want to wait until after the last frost date in your area. Toss out bulbs that have cracked or have turned soft and mushy, and plant the remaining ones as directed.
Frequently Asked Questions on Overwintering Bulbs
What does overwintering mean?
Overwintering refers to the process that ensures the survival of a plant during the winter season. Typically, the process involves using protective methods, such as bringing plants indoors for warmer temperatures or insulating outdoor plants with layers of mulch.
Can you overwinter bulbs in the ground?
Spring bulbs, such as daffodils, hyacinths, tulips, and crocus, can be left in the ground to overwinter. This is because these bulbs rely on the cold to start blooming in the summer.
On the other hand, summer bulbs, such as freesia, calla lilies, and dahlias, should be taken indoors to overwinter. You may leave them in the ground, but they will perish once the winter season starts.
Is it possible to overwinter potted bulbs?
It entirely depends on the kind of bulbs you plan to overwinter. For instance, potted cold-hardy spring bulbs can be left to overwinter outdoors. However, they won’t survive by leaving them exposed as is. You’ll need to dig a hole in the garden, bury the potted bulbs, and cover them with mulch or straw.
On the other hand, potted summer bulbs need to be overwintered in more forgiving temperatures. They can be taken indoors as is, although it is much safer to store them as recommended by this article.
Where should I store the bulbs for overwintering?
They need to be placed in a cool, dry place all throughout the winter season. You can place them in a cupboard if you have limited storage space. Otherwise, the basement or garage will work well as long as they do not become too damp or too cold. Ideally, your bulbs should be stored in temperatures around 50 F.