Orchids are one of the most unique indoor plants you’ll find, due to their delicate stems and the fabulous scent emitted from their gorgeous blooms. Though they are rare, pricey, and slightly picky about their growing conditions, they are worth the effort, adding a touch of elegance to any home.
If you happen to have one of these beauties, keeping it happy is essential to ensure your orchid thrives throughout the year. One vital step is learning how to repot orchids when they outgrow their container. Using the wrong method or repotting at the wrong time can cause irreparable damage, so it’s best to be extra careful with this process.
How To Tell When Orchids Need Repotting
All plants eventually outgrow their pots, and orchids are no exception. Of course, it’s essential to repot them at the right time to both produce a healthy plant and also save unnecessary work. There are a few things to watch for to help determine whether your orchid needs a larger container.
First, check the soil around the plant. If you see white roots showing then they don’t have enough room beneath the surface to spread out anymore. Your orchid will require a larger home to get those roots back into the soil where they belong. Roots sticking out of the soil are the biggest indicator that your plant needs a larger home and are the easiest to see as well.
You may also want to check the potting medium the orchid is planted in. Over time, the chunky material breaks down, becoming smaller pieces that retain more moisture instead of allowing it to drain. The broken-down medium also reduces airflow to the roots. Eventually, this leads to root rot if the potting medium isn’t replaced. Even if you don’t see roots sticking out, it’s a good idea to repot every other year to provide a fresh medium for your plant to grow in.
Other signs to watch for include the plant leaning to the side or dropped bottom leaves. When you notice any of these signs that your orchid requires a larger home, it’s time to consider repotting. Be careful here though, as these may be signs of things like lack of water or sun. Make sure to rule out other issues before repotting.
When to Repot An Orchid
Though you may spot the signs that your orchid needs repotting at any point, you shouldn’t just pull it from its pot and place it in a new one whenever you like. The best time to repot an orchid is during its growing season in the spring, though not while it’s blooming. Doing so can damage the plant and affect its growth cycle. Wait until flowering has ended before you repot your orchid.
You also want to avoid re-repotting during dormant periods like the winter. During this time your plant will be less ready to handle the stress of a repot, so doing so may harm it.
What You’ll Need To Repot An Orchid
Once you’ve established that your orchid needs a larger home, and it’s a safe time to repot it, the first step is to gather your materials. You’ll need a new pot, preferably one an inch or two wider than the last one.
Specialized orchid pots have holes along the sides as well as the bottom for drainage and airflow. A regular pot with bottom drainage holes is also acceptable. Ceramic, clay, glass, or plastic are all fine materials for an orchid pot, so you can pick the design you like best.
The proper potting mix is also a must for orchids. A mix of fresh pine bark, peat, perlite, and vermiculite is a good combination to match the conditions these beauties are used to. You can also make your own using 4 parts fir bark or coconut husks, 1 part perlite, and 1 part medium charcoal.
A large bucket or bowl and a pair of sterilized scissors are also required to repot an orchid. You may also want a pair of gloves to keep your hands clean during this process, though these aren’t necessary.
Step-by-step Guide To Repotting An Orchid
Once the materials are gathered it’s time to repot your orchid. The following steps will ensure that this process is done properly and safely to ensure your orchid is happy in its new home.
Step 1 – Prepare the Potting Mix
Measure out the necessary amount of potting mix and place it into the bucket or bowl. Boil double the amount of water as you have potting mix. Then, pour the water over the potting mix. Let the mixture soak until it has cooled to room temperature. You can also leave it overnight. When it has cooled, drain the water from the potting mix. This serves to sterilize the potting medium but also provides a nice moist environment for your orchid to start in.
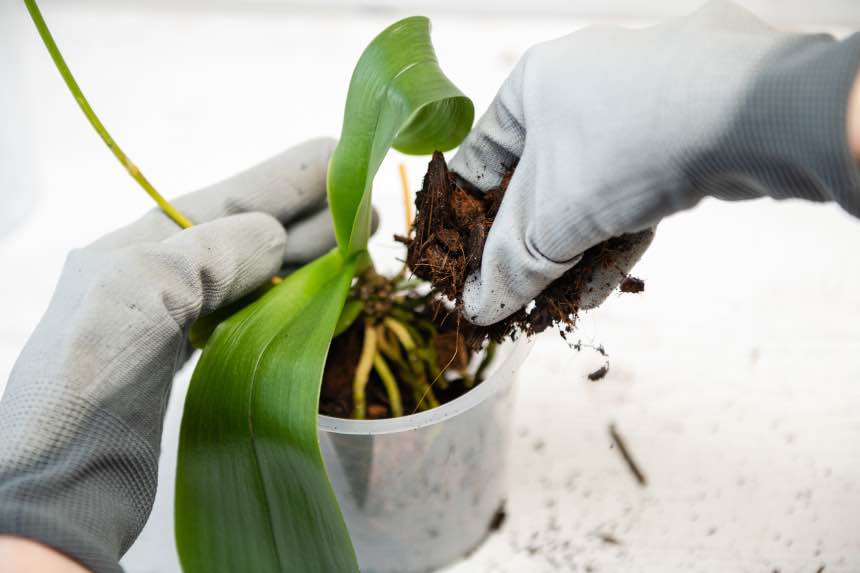
Step 2 – Remove the Orchid From its Pot
Slowly lift the orchid from its current pot. Be extra careful not to damage the roots during this process, loosening them from the sides of the pot with the tips of the scissors if needed. Remove as much of the old potting mix as you can without damaging the roots.
Step 3 – Check the Roots
Once your orchid is free of its pot, check the roots. If they are tangled, ease them apart using your fingers so they can grow freely once repotted. You can also trim off any roots that are rotting or dead using your sterilized scissors. Leaving roots bunched up will slowly choke them and reduce their ability to gather nutrients and water.
Step 4 – Place the Orchid in the New Pot
Once the roots are cleaned up, your orchid is ready to repot in its new home. Add some of the prepared potting soil to the bottom of the pot. Place your orchid in the pot so its new growth is level with the top of the container. Then add more potting soil around the orchid’s roots using your fingers. Tap the pot to help the potting mix settle and prevent large air pockets. Cover the roots completely, pressing the mix gently throughout the process, until it is level with the container’s top.
Step 5 – Add a Stake
Your orchid may not be able to stand upright on its own when repotting is complete. Adding a stake will prevent it from falling over in its pot. Gently ease the stake into the potting mix to hold up the plant.
Step 6 – Resume the Orchid’s Normal Care
Once your orchid is settled into its new pot, you can resume its care as usual. Place it somewhere it will receive bright, indirect light, and water it when the soil is almost dry. Your orchid should thrive in its new home for a year or two before it needs repotting again.
How To Repot Orchids
Orchids are beautiful plants and are well worth the effort to grow. Repotting is just one part of their care, but one that is unfortunately overlooked. Hopefully, our guide has taught you something, and kept you up to date on your plant’s home.
Repotting Orchids FAQ
How Often Do Orchids Need To Be Repotted?
It can vary on individual care and variety, but it’s generally every 1-2 years. Even if they haven’t outgrown their container it’s still a good idea to change out the soil on the same schedule.
Is It Easy To Repot Orchids?
It’s generally fairly simple but is often harder the longer you wait. This gives the roots more time to tangle, which is often the trickiest and most time-consuming part of the whole process.
How Big of a Pot Does an Orchid Need?
Generally, look to get one that is about 2-4” inches bigger than the root ball of the plant.s